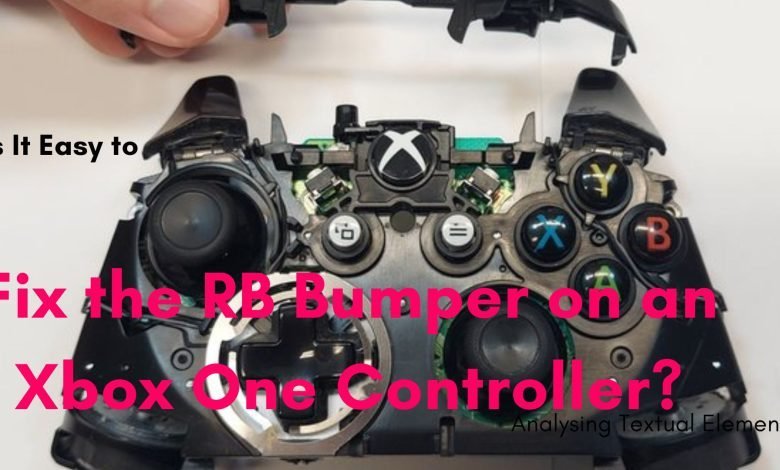
Is It Easy to Fix the RB Bumper on an Xbox One Controller?

Introduction
The Xbox One controller is a durable and well-designed gaming accessory, but like any frequently used device, it can experience wear and tear. One of the most common issues gamers face is a broken or unresponsive RB (Right Bumper) button.
If you’re wondering, “Is it easy to fix the RB bumper on an Xbox One controller?”, the answer depends on your technical skill level. For some, it’s a straightforward DIY repair, while others may prefer professional help.
In this guide, we’ll cover:
-
Common causes of RB bumper failure
-
Tools needed for the repair
-
Step-by-step repair instructions
-
Alternative solutions if DIY isn’t an option
-
Preventative measures to avoid future damage
By the end, you’ll know exactly how to fix your Xbox One controller’s RB bumper and get back to gaming quickly.
Why Does the RB Bumper Stop Working?
Before attempting a repair, it’s helpful to understand why the RB bumper fails. Common causes include:
1. Physical Damage from Drops or Impacts
The RB bumper is a plastic component that can crack or break if the controller is dropped.
2. Wear and Tear from Heavy Use
Frequent pressing (common in FPS or action games) can weaken the bumper’s plastic or internal mechanism.
3. Dirty or Sticky Buttons
Dust, dirt, or spilled liquids can cause the bumper to stick or become unresponsive.
4. Faulty or Disconnected Ribbon Cable
Inside the controller, a small ribbon cable connects the bumper to the motherboard. If this cable is loose or damaged, the button won’t work.
Tools Needed to Fix the RB Bumper
To fix your Xbox One controller’s RB bumper, you’ll need:
✅ T8 Torx Screwdriver (essential for opening the controller)
✅ Plastic Spudger or Pry Tool (to safely open the controller without scratching it)
✅ Replacement RB Bumper (available on Amazon, eBay, or repair shops)
✅ Isopropyl Alcohol & Cotton Swabs (for cleaning sticky buttons)
✅ Tweezers (helpful for handling small components)
✅ Soldering Iron (if the bumper’s solder joints are damaged – rare but possible)
Most repairs don’t require soldering, but having one on hand can help if the bumper’s connections are broken.
Step-by-Step Guide to Fixing the RB Bumper
Step 1: Open the Xbox One Controller
Remove the batteries (if using a wireless controller).
Use the T8 Torx screwdriver to remove the screws under the handles (hidden under the grips or behind stickers).
Gently pry open the controller using a plastic spudger to avoid damaging the clips.
Step 2: Locate the RB Bumper Mechanism
Once opened, you’ll see:
The RB bumper plastic piece
The tactile switch (small button underneath the bumper)
The ribbon cable connecting the bumper to the motherboard
Step 3: Inspect the Damage
If the plastic bumper is broken, you’ll need a replacement.
If the button is sticky, clean it with isopropyl alcohol.
If the ribbon cable is loose, reattach it carefully.
Step 4: Replace the RB Bumper (If Needed)
Remove the old bumper by gently lifting it from its socket.
Insert the new bumper, ensuring it clicks into place.
Test the button before reassembling the controller.
Step 5: Reassemble the Controller
Snap the controller halves back together.
Reinsert the screws with the T8 Torx driver.
Test the RB button to ensure it works properly.
Alternative Solutions If DIY Repair Isn’t an Option
If you’re not comfortable opening the controller, consider:
1. Contacting Microsoft Support
-
If under warranty, Microsoft may repair or replace it for free.
2. Visiting a Professional Repair Shop
-
Local electronics repair shops can fix it for a small fee.
3. Buying a New Controller
-
If the repair cost is too high, a new or refurbished controller may be a better option.
How to Prevent Future RB Bumper Issues
To extend your controller’s lifespan:
✔ Avoid excessive force when pressing buttons.
✔ Clean your controller regularly with compressed air.
✔ Store it in a safe place to prevent drops.
✔ Use a protective case for added durability.
Conclusion: Is Fixing the RB Bumper Easy?
Fixing the RB bumper on an Xbox One controller is moderately easy if you have the right tools and follow a step-by-step guide. Most repairs involve:
Opening the controller
Replacing a broken bumper
Cleaning sticky buttons
If you’re uncomfortable with DIY repairs, professional help is always an option.
By following this guide, you can save money and extend your controller’s life, ensuring smooth gaming without interruptions.
FAQs About Fixing the RB Bumper
Q: Can I fix the RB bumper without opening the controller?
A: No, you need to open it to access the bumper mechanism.
Q: How much does a replacement RB bumper cost?
A: Around 5−10 on Amazon or eBay.
Q: Will Microsoft repair my controller for free?
A: Only if it’s under warranty. Otherwise, there may be a fee.
Q: How long does the repair take?
A: About 15-30 minutes for most people.
Q: Can I use super glue to fix a broken bumper?
A: It’s not recommended—glue can interfere with button movement.
More about xbox controller:
Is It Easy to Fix the RB Bumper on an Xbox One Controller?
rb button not working xbox series x
how to fix rb button on xbox controller?
What does RB mean on an Xbox controller?
Master the RB Button on Your Xbox Controller: A Guide
how to fix xbox controller drift